Introduction to Service Worker
Rich offline experiences, periodic background syncs, push notifications functionality that would normally require a native application are coming to the web. Service workers provide the technical foundation that all these features rely on.
What is a Service Worker?
A service worker is a script that your browser runs in the background separate from a web page, opening the door to features that don't need a web page or user interaction. Today, they already include features like push notifications and background sync. In the future, service workers might support other things like periodic sync or geofencing.The core feature discussed in this CookBook is the ability to intercept and handle network requests, including programmatically managing a cache of responses.
The reason this is such an exciting API is that it allows you to support offline experiences, giving developers complete control over the experience.
Before service worker, there was one other API that gave users an offline experience on the web called AppCache. There are a number of issues with the AppCache API that service workers were designed to avoid.
-
add_circleThings to note about a service worker:It's a JavaScript Worker, so it can't access the DOM directly. Instead, a service worker can communicate withthe pages it controls by responding to messages sent via the postmessage interface, and those pages can manipulate the DOM if needed.Service worker is a programmable network proxy, allowing you to control how network requests from your page are handled.It's terminated when not in use, and restarted when it's next needed, so you cannot rely on global state within a service worker's onfetch and onmessage handlers. If there is information that you need to persist and reuse across restarts, service workers do have access to the IndexedDB API.
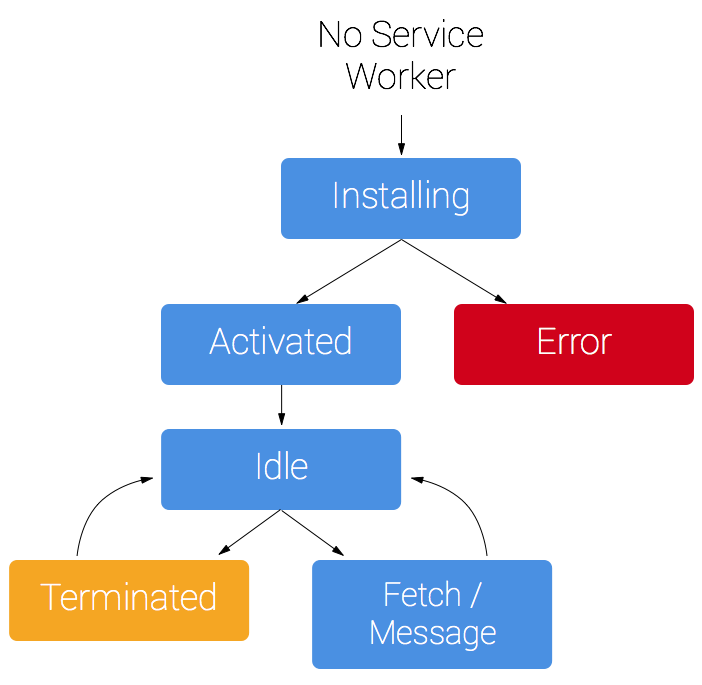
The Service Worker Life Cycle
A service worker has a lifecycle that is completely separate from your web page. A service worker goes through three steps in its lifecycle:
Registration >> Installation >> Activation
To install a service worker for your site,you need to register it, which you do in your page's JavaScript. Registering a service worker will cause the browser to start the service worker install step in the background.
Typically during the install step, you'll want to cache some static assets. If all the files are cached successfully, then the service worker becomes installed. If any of the files fail to download and cache, then the install step will fail and the service worker won't activate (i.e. won't be installed). If that happens, don't worry, it'll try again next time. But that means if it does install, you know you've got those static assets in the cache.
When installed, the activation step will follow and this is a great opportunity for handling any management of old caches, which we'll cover during the service worker update section.
After the activation step, the service worker will control all pages that fall under its scope, though the page that registered the service worker for the first time won't be controlled until it's loaded again. Once a service worker is in control, it will be in one of two states: either the service worker will be terminated to save memory, or it will handle fetch and message events that occur when a network request or message is made from your page.
Below is an overly simplified version of the service worker lifecycle on its first installation.
-
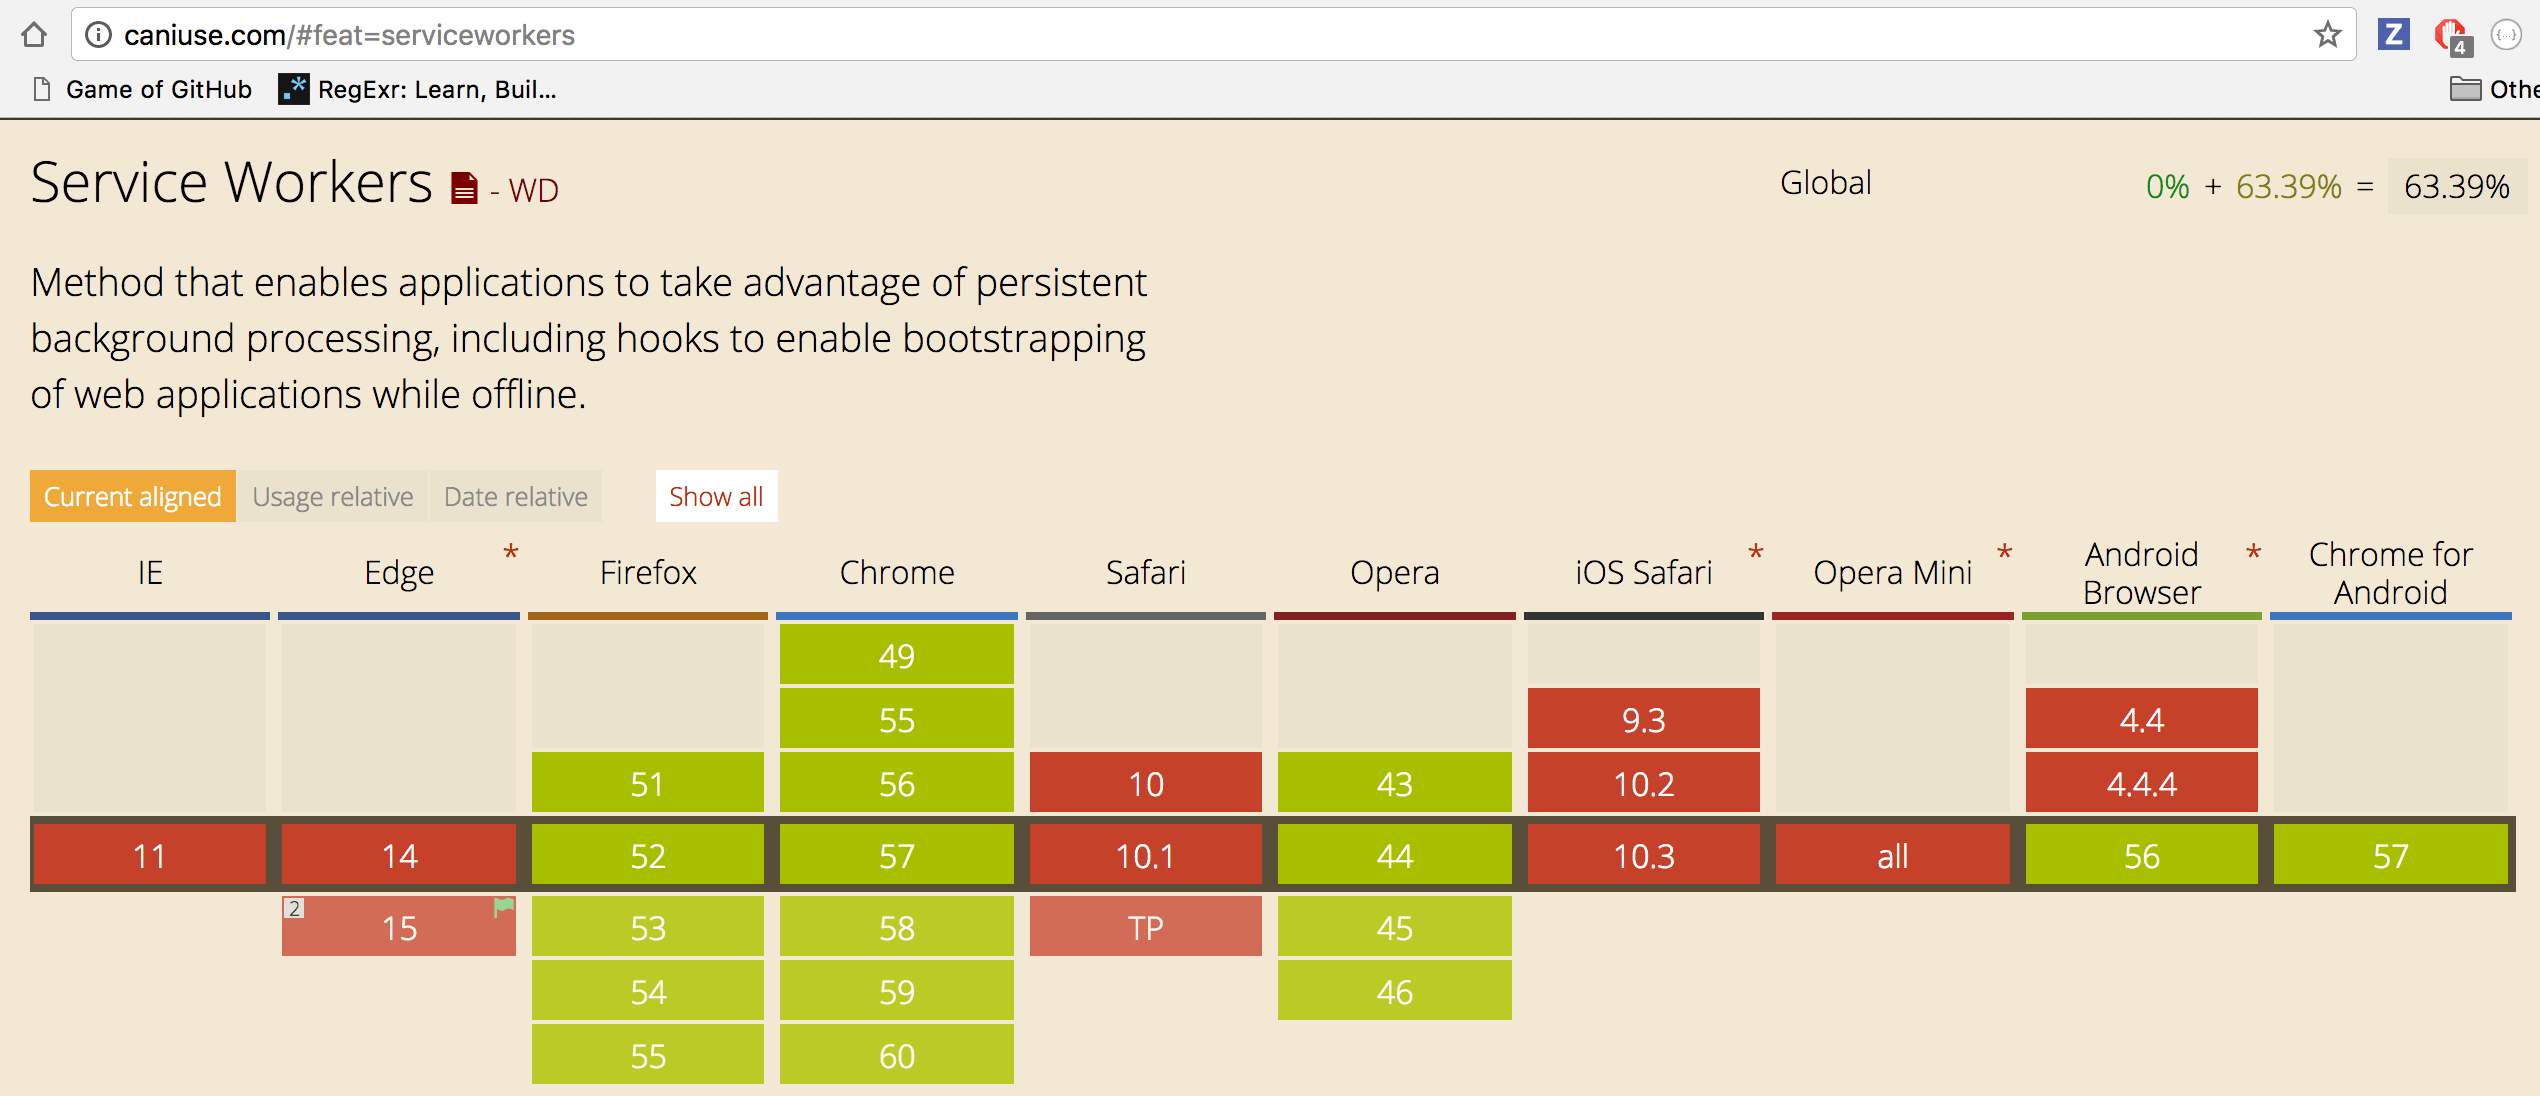
add_circleBrowser SupportBrowser options are growing. Service workers are supported by Chrome Firefox and Opera. Microsoft Edge is now showing public support. Even Safari has dropped hints of future development.

-
add_circleYou need HTTPSUsing service worker you can hijack connections, fabricate, and filter responses. Powerful stuff. While you would use these powers for good, a man-in-the-middle might not. To avoid this, you can only register service workers on pages served over HTTPS, so we know the service worker the browser receives hasn't been tampered with during its journey through the network.During development you'll be able to use service worker through localhost, but to deploy it on a site you'll need to have HTTPS setup on your server.Firebase are served over HTTPS, so they're a great place to host demos.
Register a Service Worker
To install a service worker you need to kick start the process by registering it in your page. This tells the browser where your service worker JavaScript file lives.
-
add_circleCODE:
if ('serviceWorker' in navigator) {
window.addEventListener('load', function() {
  navigator.serviceWorker
  .register('/sw.js')
  .then(function(registration) {
    console.log('ServiceWorker registered');
  }, function(err) {
    console.log('ServiceWorker registration failed: ', err);
  });
});
}
This code checks to see if the service worker API is available, and if it is, the service worker at /sw.js is registered once the page is loaded.
You can call register() every time a page loads without concern; the browser will figure out if the service worker is already registered or not and handle it accordingly.
One subtlety with the register() method is the location of the service worker file. You'll notice in this case that the service worker file is at the root of the domain. This means that the service worker's scope will be the entire origin. In other words, this service worker will receivefetch events for everything on this domain. If we register the service worker file at /example/sw.js, then the service worker would only see fetch events for pages whose URL starts with /example/ (i.e. /example/page1/, /example/page2/).
Now you can check that a service worker is enabled by going to chrome://inspect/#service-workers and looking for your site.
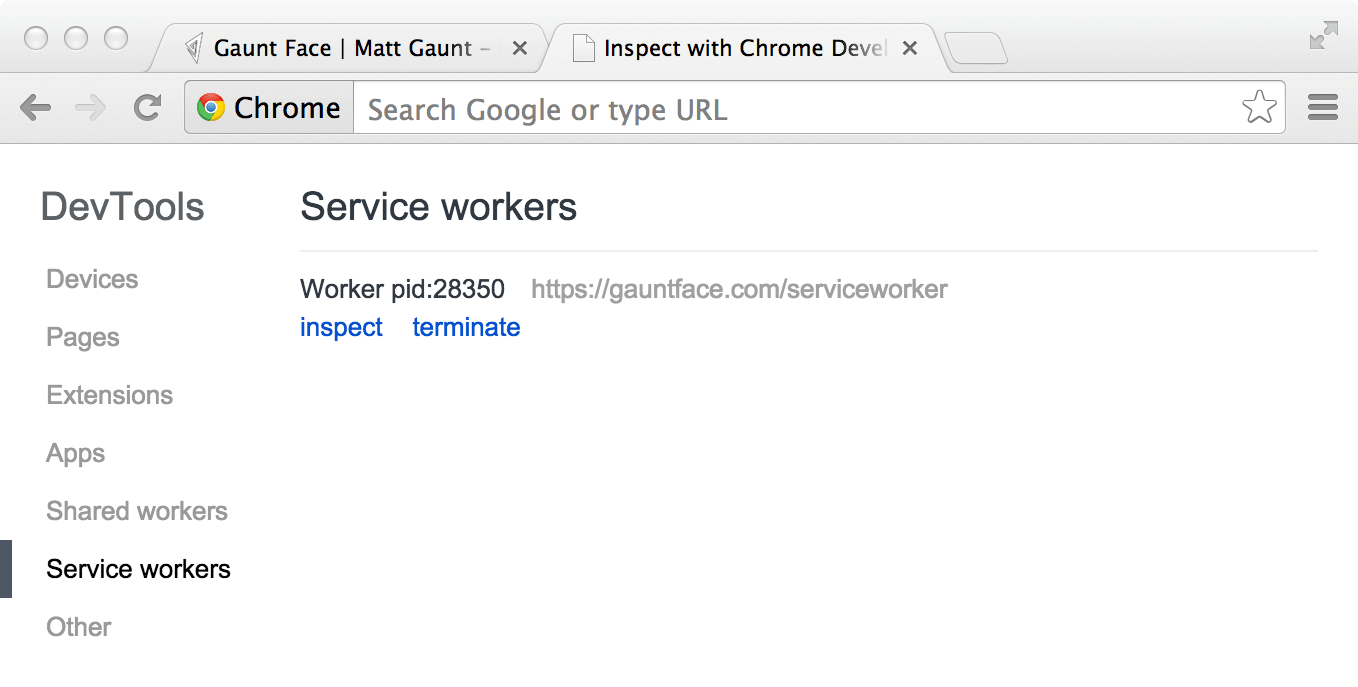
When service worker was first being implemented, you could also view your service worker details through chrome://serviceworker-internals. This may still be useful, if for nothing more than learning about the life cycle of service workers, but don't be surprised if it gets replaced completely by chrome://inspect/#service-workers at a later date.
You may find it useful to test your service worker in an Incognito window so that you can close and reopen knowing that the previous service worker won't affect the new window. Any registrations and caches created from within an Incognito window will be cleared out once that window is closed.
Install a Service Worker
After a controlled page kicks off the registration process, let's shift to the point of view of the service worker script, which handles the install event.
For the most basic example, you need to define a callback for the install event and decide which files you want to cache.
-
add_circleCODE:
self.addEventListener('install', function(event) {
  // Perform install steps
});
Inside of our install callback, we need to take the following steps:
Open a Cache >> Cache our files >> Confirm whether all the required assets are cached or not.
-
add_circleCODE:
              var CACHE_NAME = 'my-site-cache-v1';
var urlsToCache = [
  '/',
  '/styles/main.css',
  '/script/main.js'
];

self.addEventListener('install', function(event) {
  // Perform install steps
  event.waitUntil(
    caches.open(CACHE_NAME)
      .then(function(cache) {
        console.log('Opened cache');
        return cache.addAll(urlsToCache);
      })
  );
});
Here you can see we call caches.open() with our desired cache name, after which we call cache.addAll() and pass in our array of files. This is a chain of Promises (caches.open() and cache.addAll()). The event.waitUntil() method takes a Promise and uses it to know how long installation takes, and whether it succeeded or not.
If all the files are successfully cached, then the service worker will be installed. If any of the files fail to download, then the install step will fail. This allows you to rely on having all the assets that you defined, but does mean you need to be careful with the list of files you decide to cache in the install step. Defining a long list of files will increase the chance that one file may fail to cache, leading to your service worker not getting installed.
This is just one example, you can perform other tasks in the install event or avoid setting an install event listener altogether.
Cache and return requests
Now that you've installed a service worker, you probably want to return one of your cached responses, right?
After a service worker is installed and the user navigates to a different page or refreshes, the service worker will begin to receive fetch events, an example of which is below.
-
add_circleCODE:
            self.addEventListener('fetch', function(event) {
event.respondWith(
  caches.match(event.request)
    .then(function(response) {
      // Cache hit - return response
      if (response) {
        return response;
      }
      return fetch(event.request);
    }
  )
);
});
Here we've defined our fetch event and within event.respondWith(), we pass in a Promise from caches.match(). This method looks at the request and finds any cached results from any of the caches your service worker created.
If we have a matching response, we return the cached value, otherwise we return the result of a call to fetch, which will make a network request and return the data if anything can be retrieved from the network. This is a simple example and uses any cached assets we cached during the install step.
Caching Files with Service Worker
Using the Cache API in the service worker
The Service WorkerAPI comes with a Cache interface, that lets you create stores of responses keyed by request. While this interface was intended for service workers it is actually exposed on the window, and can be accessed from anywhere in your scripts. The entry point is caches.
You are responsible for implementing how your script (service worker) handles updates to the cache. All updates to items in the cache must be explicitly requested; items will not expire and must be deleted. However, if the amount of cached data exceeds the browser's storage limit, the browser will begin evicting all data associated with an origin, one origin at a time, until the storage amount goes under the limit again. See Browser storage limits and eviction criteria for more information.
Caching On user interaction
If the whole site can't be taken offline, you can let the user select the content they want available offline (for example, a video, article, or photo gallery).
One method is to give the user a "Read later" or "Save for offline" button. When it's clicked,fetch what you need from the network and put it in the cache:
-
add_circleCODE:
              document.querySelector('.cache-article')
.addEventListener('click', function(event) {
  event.preventDefault();
  var id = this.dataset.articleId;
  caches.open('mysite-article-' + id)
  .then(function(cache) {
    fetch('/get-article-urls?id=' + id)
    .then(function(response) {
      // /get-article-urls returns a JSON-encoded array of
      // resource URLs that a given article depends on
      return response.json();
    }).then(function(urls) {
      cache.addAll(urls);
    });
  });
});
In the above example, when the user clicks an element with the cache-article class, we are getting the article ID, fetching the article with that ID, and adding the article to the cache.
-
add_circleNOTE:The Cache API is available on the window object, meaning you don't need to involve the service worker to add things to the cache.
Caching On network response
If a request doesn't match anything in the cache, get it from the network, send it to the page and add it to the cache at the same time.
-
add_circleCODE:
              self.addEventListener('fetch', function(event) {
  event.respondWith(
    caches.open('mysite-dynamic')
    .then(function(cache) {
      return cache.match(event.request)
      .then(function (response) {
        return response || fetch(event.request)
        .then(function(response) {
          cache.put(event.request, response.clone());
          return response;
        });
      });
    })
  );
});
This approach works best for resources that frequently update, such as a user's inbox or article contents. This is also useful for non-essential content such as avatars, but care is needed. If you do this for a range of URLs, be careful not to bloat the storage of your origin — if the user needs to reclaim disk space you don't want to be the prime candidate. Make sure you get rid of items in the cache you don't need any more.
-
add_circleNOTE:To allow for efficient memory usage, you can only read a response/request's body once. In the code above, .clone() is used to create a copy of the response that can be read separately.
Serving files from the cache
To serve content from the cache and make your app available offline you need to intercept network requests and respond with files stored in the cache. There are several approaches to this:
- cache only
- network only
- cache falling back the network
- network falling back to cache
- cache then network
-
add_circleNOTE:There are a few approaches we don't cover here. See Jake Archibald's Offline Cookbook for a full list.
Cache only
You don't often need to handle this case specifically. Cache falling back to network is more often the appropriate approach.
This approach is good for any static assets that are part of your app's main code (part of that "version" of your app). You should have cached these in the install event, so you can depend on them being there.
-
add_circleCODE:
              self.addEventListener('fetch', function(event) {
  event.respondWith(caches.match(event.request));
});
If a match isn't found in the cache, the response will look like a connection error.
Network only
This is the correct approach for things that can't be performed offline, such as analytics pings and non-GET requests. Again, you don't often need to handle this case specifically and the cache falling back to network approach will often be more appropriate.
-
add_circleCODE:
              self.addEventListener('fetch', function(event) {
  event.respondWith(fetch(event.request));
});
Alternatively, simply don't call event.respondWith, which will result in default browser behaviour.
Cache falling back to network
If you're making your app offline-first, this is how you'll handle the majority of requests. Other patterns will be exceptions based on the incoming request.
-
add_circleCODE:
              self.addEventListener('fetch', function(event) {
  event.respondWith(
    caches.match(event.request)
    .then(function(response) {
      return response || fetch(event.request);
    })
  );
});
This gives you the "Cache only" behavior for things in the cache and the "Network only" behaviour for anything not cached (which includes all non-GET requests, as they cannot be cached).
Network falling back to the cache
This is a good approach for resources that update frequently, and are not part of the "version" of the site (for example articles, avatars, social media timelines, game leader boards). Handling network requests this way means the online users get the most up-to-date content, and offline users get an older cached version.
However, this method has flaws. If the user has an intermittent or slow connection they'll have to wait for the network to fail before they get content from the cache. This can take an extremely long time and is a frustrating user experience. See the next approach, Cache then network, for a better solution.
-
add_circleCODE:
              self.addEventListener('fetch', function(event) {
  event.respondWith(
    fetch(event.request)
    .catch(function() {
      return caches.match(event.request);
    })
  );
});
Here we first send the request to the network using fetch(), and only if it fails do we look for a response in the cache.
Cache then network
This is also a good approach for resources that update frequently. This approach will get content on screen as fast as possible, but still display up-to-date content once it arrives.
This requires the page to make two requests: one to the cache, and one to the network. The idea is to show the cached data first, then update the page when/if the network data arrives.
Here is the code in the page:
-
add_circleCODE:
              self.addEventListener('install', function(event) {
  // Perform install steps
});
We are sending a request to the network and the cache. The cache will most likely respond first and, if the network data has not already been received, we update the page with the data in the response. When the network responds we update the page again with the latest information.
Here is the code in the service worker:
-
add_circleCODE:
              self.addEventListener('install', function(event) {
  // Perform install steps
});
This caches the network responses as they are fetched.
Sometimes you can replace the current data when new data arrives (for example, game leaderboard), but be careful not to hide or replace something the user may be interacting with. For example, if you load a page of blog posts from the cache and then add new posts to the top of the page as they are fetched from the network, you might consider adjusting the scroll position so the user is uninterrupted. This can be a good solution if your app layout is fairly linear.
Generic fallback
If you fail to serve something from the cache and/or network you may want to provide a generic fallback. This technique is ideal for secondary imagery such as avatars, failed POST requests, "Unavailable while offline" page.
-
add_circleCODE:
              self.addEventListener('install', function(event) {
  // Perform install steps
});
The item you fallback to is likely to be an install dependency.
You can also provide different fallbacks based on the network error:
-
add_circleCODE:
              self.addEventListener('install', function(event) {
  // Perform install steps
});
Network response errors do not throw an error in the fetch Promise. Instead fetch returns the response object containing the error code of the network error. This means we handle network errors in a .then instead of a .catch.
Removing outdated caches
Once a new service worker has installed and a previous version isn't being used, the new one activates, and you get an activate event. Because the old version is out of the way, it's a good time to delete unused caches.
-
add_circleCODE:
              self.addEventListener('install', function(event) {
  // Perform install steps
});
During activation, other events such as fetch are put into a queue, so a long activation could potentially block page loads. Keep your activation as lean as possible, only using it for things you couldn't do while the old version was active.
Here we cover the Cache API properties and methods.
Checking for support
We can check if the browser supports the Cache API like this:
-
add_circleCODE:
              self.addEventListener('install', function(event) {
  // Perform install steps
});
Creating the cache
An origin can have multiple named Cache objects. To create a cache or open a connection to an existing cache we use the caches.open method.
-
add_circleCODE:
              self.addEventListener('install', function(event) {
  // Perform install steps
});
This returns a Promise that resolves to the cache object. caches.open accepts a string that will be the name of the cache.
Working with data
The Cache API comes with several methods that let us create and manipulate data in the cache. These can be grouped into methods that either create, match, or delete data.
Create data
There are three methods we can use to add data to the cache. These are add, addAll, and put. In practice, we will call these methods on the cache object returned from caches.open(). For example:
-
add_circleCODE:
              self.addEventListener('install', function(event) {
  // Perform install steps
});
caches.open returns the example-cache Cache object, which is passed to the callback in .then. We call the add method on this object to add the file to that cache.
cache.add(request) - The add method takes a URL, retrieves it, and adds the resulting response object to the given cache. The key for that object will be the request, so we can retrieve this response object again later by this request.
cache.addAll(requests) - This method is the same as add except it takes an array of URLs and adds them to the cache. If any of the files fail to be added to the cache, the whole operation will fail and none of the files will be added.
cache.put(request, response) - This method takes both the request and response object and adds them to the cache. This lets you manually insert the response object. Often, you will just want to fetch() one or more requests and then add the result straight to your cache. In such cases you are better off just using cache.add or cache.addAll, as they are shorthand functions for one or more of these operations:
-
add_circleCODE:
              self.addEventListener('install', function(event) {
  // Perform install steps
});
Match data
There are a couple of methods to search for specific content in the cache: match and matchAll. These can be called on the caches object to search through all of the existing caches, or on a specific cache returned from caches.open().
caches.match(request, options) - This method returns a Promise that resolves to the response object associated with the first matching request in the cache or caches. It returns undefined if no match is found. The first parameter is the request, and the second is an optional list of options to refine the search. Here are the options as defined by MDN:
- ignoreSearch: A Boolean that specifies whether to ignore the query string in the URL. For example, if set to true the ?value=bar part of http://foo.com/?value=bar would be ignored when performing a match. It defaults to false.
- ignoreMethod: A Boolean that, when set to true, prevents matching operations from validating the Request HTTP method (normally only GET and HEAD are allowed.) It defaults to false.
- ignoreVary: A Boolean that when set to true tells the matching operation not to perform VARY header matching — that is, if the URL matches you will get a match regardless of whether the Response object has a VARY header. It defaults to false.
- cacheName: A DOMString that represents a specific cache to search within. Note that this option is ignored by Cache.match().
caches.matchAll(request, options) - This method is the same as .match except that it returns all of the matching responses from the cache instead of just the first. For example, if your app has cached some images contained in an image folder, we could return all images and perform some operation on them like this:
-
add_circleCODE:
              self.addEventListener('install', function(event) {
  // Perform install steps
});
Delete data
We can delete items in the cache with cache.delete(request, options). This method finds the item in the cache matching the request, deletes it, and returns a Promise that resolves to true. If it doesn't find the item, it resolves to false. It also has the same optional options parameter available to it as the match method.
Retrieve keys
Finally, we can get a list of cache keys using cache.keys(request, options). This returns a Promise that resolves to an array of cache keys. These will be returned in the same order they were inserted into the cache. Both parameters are optional. If nothing is passed, cache.keys returns all of the requests in the cache. If a request is passed, it returns all of the matching requests from the cache. The options are the same as those in the previous methods.
The keys method can also be called on the caches entry point to return the keys for the caches themselves. This lets you purge outdated caches in one go.
Update a Service Worker
There will be a point in time where your service worker will need updating. When that time comes, you'll need to follow these steps:
- 1. Update your service worker JavaScript file. When the user navigates to your site, the browser tries to redownload the script file that defined the service worker in the background. If there is even a byte's difference in the service worker file compared to what it currently has, it considers it new.
- 2. Your new service worker will be started and the install event will be fired.
- 3. At this point the old service worker is still controlling the current pages so the new service worker will enter a waiting state.
- 4. When the currently open pages of your site are closed the old service worker will be killed and the new service worker will take control.
- 5. Once your new service worker takes control, its activate event will be fired.
One common task that will occur in the activate callback is cache management. The reason you'll want to do this in the activate callback is because if you were to wipe out any old caches in the install step, any old service worker, which keeps control of all the current pages, will suddenly stop being able to serve files from that cache.
Let's say we have one cache called 'my-site-cache-v1', and we find that we want to split this out into one cache for pages and one cache for blog posts. This means in the install step we'd create two caches, 'pages-cache-v1' and 'blog-posts-cache-v1' and in the activate step we'd want to delete our older 'my-site-cache-v1'.
The following code would do this by looping through all of the caches in the service worker and deleting any caches that aren't defined in the cache whitelist.
-
add_circleCODE:
              var CACHE_NAME = 'my-site-cache-v1';
var urlsToCache = [
  '/',
  '/styles/main.css',
  '/script/main.js'
];

self.addEventListener('install', function(event) {
  // Perform install steps
  event.waitUntil(
    caches.open(CACHE_NAME)
      .then(function(cache) {
        console.log('Opened cache');
        return cache.addAll(urlsToCache);
      })
  );
});